Kamis, 26 Agustus 2010

Mark Bittman's Tomato Cobbler

IMG_0614

So you know when it's snowing outside (you remember winter, don't you? I feel like it's already right around the corner, but I'm a pessimist like that), and freezing, and maybe it's freezing in your apartment, too? So freezing, in fact, that if you're me, you're wearing your kind-of-ugly red looks-like-a-down-sleeping-bag winter coat inside your apartment just to keep from dieing. That really happened last year, during the winter. But I'm hoping that the genius make-shift insulation that R made out of a box that once contained corn pops and another for dog biscuits will keep the place warm when we get there again this year.

IMG_0691

Anyway. On this particular day I'm rambling about, I came across Mark Bittman's recipe for Tomato Cobbler. And in the middle of the winter, when all that's available are watery, tasteless grocery store tomatoes, just the thought of August weather and August produce was enough to make me cry frozen tears. But on that day, I promised myself that once August rolled around, I would have Tomato Cobbler, and it would be made in shorts or a sun dress with tomatoes from a farmers market. Readers? Objective achieved.

IMG_0722

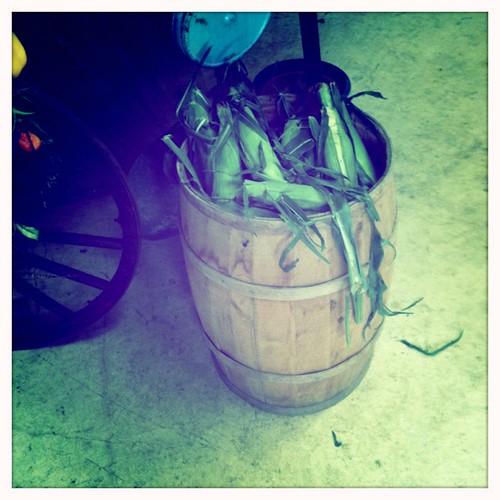
My cousin and I made this dish the other weekend during a kind of spur-of-the-moment family gathering at my Nana's house in Connecticut. We bought the tomatoes at a road-side farm stand that we found driving back from a rediculous trail run in one of Connecticut's national parks. You could call it the perfect summer day.

IMG_0686

A few notes. First, as is his practice in the 'How to Cook Everything' series, Bittman gives a few variations for the recipe. We took him up on his suggestion of tossing in a couple of ears worth of fresh corn kernels with the tomatoes. But we didn't add a cup of grated cheddar to the topping, and both my cousin and I agree that we wish that we had. Maybe you should give it a try instead.

Tomato Cobbler
Adopted from Mark Bittman's How to Cook Everything Vegetarian

8 to 10 medium tomatoes (red and yellow if you're lucky enough to find them at the farmers market), cored and cut into wedges
1 tablespoon cornstarch
Salt and pepper to taste
1 cup all-purpose flour
1 cup cornmeal
1 1/2 teaspoons baking powder
1/4 teaspoon baking soda
4 tablespoons butter, cut into large chunks and very cold
1 egg, beaten
3/4 cup buttermilk
Kernels from a couple of ears of corn
1 cup grated cheddar cheese (optional, because I didn't try it, but wish I had)

Grease a 9" pyrex or other comparable baking dish. Oven preheated to 375 F.

Put the tomato wedges and corn kernels into the baking dish and toss them with the cornstarch and the salt and pepper. Set aside.

In the bowl of a food processor, but the flour, cornmeal, baking powder and baking soda, as well as a teaspoon of salt, and pulse to combine. And the butter and give it a few more pulses until it looks like coarse sand. Add the egg, buttermilk and grated cheese, if you're using it, and pulse once more, until the mixture comes together like a dough ball. You might need to add a bit more flour if it's too wet, or a bit more buttermilk if it's too dry.

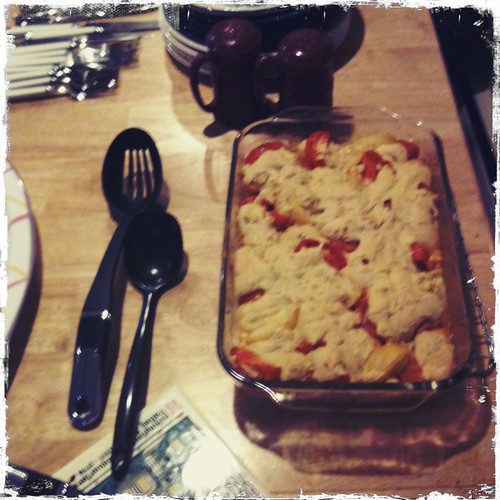
Make sure the tomatoes are spread fairly evenly on the bottom of the baking dish, and then drop the batter by spoonfools on top. You want to make sure that there are some cracks between the dough so that steam can escape from the tomatoes as it cooks.

Bake for 45 to 50 minutes until the cobbler is golden brown and bubbling underneath. It's best to serve this at room temperature, so making it a bit ahead is a good idea.

Selasa, 24 Agustus 2010

Manhattan Clam Chowder

clam chowder

So the other weekend, R and I took the train from Manhattan out to New England to visit my Nana, aunts, uncles and cousins. And on the first day, my aunt J served this Manhattan Clam Chowder...in New England. Of course, the difference between a Manhattan Clam Chowder and a New England Clam Chowder has nothing to do with where they're served. The Manhattan version is served in a broth with tomatoes, while the New England version is a cream-based soup. I've always preferred the Manhattan type (as I tend to do in most matters), but this version was seriously great. Seriously. As R sopped the last drop from his bowl with a piece of bread, he looked up and said 'You must get this recipe.' That does not happen very often.

So of course I complied. My family is always amenable to giving out recipes, they're generous like that. In fact, you might remember those homemade twix bars from a while back. Well my aunt-to-be included them in an Easter basket that she put together for R and I last year, and told them they were my Aunt J's recipe (same aunt you can thank for this chowder). Of course, I had given the recipe to J in the first place! And I love that about my family, always recipes away and passing food around. None of this 'secret family recipe' business for us.

IMG_0689

So anyway, this is some good stuff. I like the idea of reproducing recipes the way they were given to me. My mom has her style, Aunt J has hers, and I like to keep them intact. Neither one of them writes out a list of ingredients at the top, so I'll bold them in the body of the recipe for easy shopping list making.

Aunt J's Manhattan Clam Chowder


Brown 1/4 lb chopped bacon in a 5 quart saucepan over medium high heat for 2 minutes. Remove the bacon and drain on paper towels. In the drippings, saute 1/2 small onion, chopped, and 2 small ribs of celery, also chopped, along with 1/2 teaspoon dried thyme for 4 minutes.

Add 2 x 14 oz can of chopped tomatoes with jalapeno peppers, two 8 oz bottles of clam juice, 2-3 medium potatoes chopped to bite-size pieces with the skin on, 1 teaspoon salt, 1/8 teaspoon pepper. Simmer, covered, for 10 minutes. Stir in 2 x 10g cans of whole baby clams (you can chop some of them) with their juice and a 7 ounce can of corn kernels, drained, as well as the reserved bacon. Heat it through, and serve

Senin, 16 Agustus 2010

My Nana's Blueberry Buckle

blueberry buckle 2

We all have recipes that remind us of childhood. This one reminds me of both childhood and summer. Weeks spent at my grandparents' house in Connecticut, playing in the pool, cuddling the dog, chasing the cousins around the yard. Actually, in my case, I remember a fair amount of corralling the cousins, all of them younger than I. Two weeks of having five little siblings to boss around.

blueberry buckle 3

And my Nana had blueberry bushes growing out by the pool. We used to pick them for her, and only the promise of cakes like this one could get us to actually bring any of them inside before eating them all ourselves. Back in Colorado we'd read Blueberries for Sal, about a little girl's blueberry-picking adventures in Maine, and remember the satisfaction of eating fruit plucked straight off the bush.

blueberry buckle

Nana often had a sheet of blueberry buckle waiting for us by the time we rolled out of bed and made it out onto the covered porch for breakfast. The recipe comes from a small spiral-bound cookbook, shaped like a basket of strawberries. Just the kind of down-home collection such a recipe should be from. As far as old-fashioned American desserts, the buckle is pretty straight forward. It's just a single layer of cake with fruit, usually blueberries, tossed over it and topped with crumbs of butter, flour and sugar. And it makes for wonderful childhood memories.

Nana's Blueberry Buckle
Adapted from A Very Berry Cookbook by Judith Bosley
2 cups flour
2 1/2 teaspoons baking powder
1/4 teaspoon salt
1/2 cup butter
1/2 cup sugar
1 egg
1/2 cup milk
Topping:
2 cups fresh blueberries
1/2 cup flour
1/4 cup butter
1/2 cup sugar
1/2 teaspoon cinnamon
Combine the first three ingredients. Cream the butter and sugar, then add the egg. Next, add the dry ingredients alternately with the milk. Spread the batter in a greased 13x9 inch pan. Sprinkle with the berries, and set aside. In another bowl, combine the remaining topping ingredients. Kneed them with your fingers until the mixture is a crumbly texture, and sprinkle over the berries. Bake at 350F for 35-45 minutes.

Rabu, 11 Agustus 2010

Classic Lemon Bars

lemon bars with ribbon 2

The other day I literally gave myself a blister beating and whisking a lemon cream that was supposed to come to a certain temperature and never did. This one is not such a fussy cream. It's the 30 minute version, easy, no special techniques, pretty fool proof. And just what I needed after a string of kitchen failures that never even made it onto the blog.

lemon bars on plates

The crust is kind of a shortbread that is simply spun around in the food processor and then pressed into the pan. Really, nothing could be simpler. The filling, too, is straightforward and can be whipped up quickly while the crust partially bakes. The only planning ahead is for refrigeration. Completely non-active.

lemon bars one layer

I brought them to Prospect Park for a friend's birthday BBQ. And they survived the hour subway ride from the Upper, Upper East Side, and then a 40 minute trek through the park when we discovered that the one train which ran even somewhat conveniently from our side of the island to Brooklyn let us off near the exact opposite corner of the park from where we were supposed to be. But there's something about New York that makes these escapades doable, where I probably wouldn't dream of driving an hour and then walking more than half of that for a picnic in any other place.

lemon bars with ribbon

Classic Lemon Bars
Adapted to add more lemon flavor from The Gourmet Cookbook

Crust
2 cup all-purpose flour
1/2 cup granulated sugar
1/2 teaspoon salt
12 tablespoons cold unsalted butter, cut into chunks

Filling
3 large eggs
1/2 cup granulated sugar
2 tablespoons + 1 teaspoon all-purpose flour
2 tablespoons heavy cream
2 teaspoons grated lemon zest, from about 2 lemons
1/2 cup fresh lemon juice, from about 2 lemons
1/8 teaspoon salt

Powdered Sugar for garnish

Preheat the oven to 350F, with a rack in the middle. You'll use a 9 inch square pan, but you can leave it ungreased.

For the crust: In a food processor, pulse together all of the ingredients except the butter to combine. Add the butter and pulse until the mixture looks like course meal. Pour the dough into your pan and press it onto the bottom. Bake for about 20 minutes, until the crust is just barely golden brown.

In the meantime, make the filling: Whisk together all of the ingredients for the filling until combined. Be sure there are no lumps of flour left in the mixture.

When the crust has been partly baked, remove it from the oven and pour the filling into the still-warm crust. Return to the oven until the filling is set, about 16 minutes. Transfer the whole pan to a rack to cool. Cover and refrigerate until cold. This will take at least 4 hours, so you may as well give yourself overnight.

To serve, cut the bars and sprinkle with powdered sugar.

Summer Holiday

Ferris Wheel

I'm in mid air at the moment, enjoying a blogging break encouraged as much by summer-swelter meltdown as mandated by on-line burnout. My presence for the next few weeks will be limited to catching up on visiting and commenting on your sites, malingering on Flickr, and the occasional chirp on Twitter. Behind the scenes, I am restoring my blogroll, and improving my About page to include FAQs and policies, New Year's resolutions which I've always held a commitment to fulfill rather than break.

I wish you all a very happy, healthy, and heat-resistant August. See you at the end of the month!


Kamis, 05 Agustus 2010

Apple-Banana-Walnut Nugget Cake

colorado apple cake

So right off the bat, I'll tell you that when I was asked to review Warren Brown's newest book United Cakes of America, I didn't hesitate. For one thing? Cake. For another thing? Warren Brown is pretty hot. Both of these should be good enough reasons. So the premise of the book is that Brown traveled around the US, collecting and developing recipes that he felt represented each of the fifty states. Some are classics, closely associated with the state from which they come, like New York Style Cheesecake and Florida Key Lime Pie. Some states, however, lack such a storied culinary history. Colorado, for example. My home state.

But Brown didn't give up on Colorado, or anything, and he relates a story about visiting Pikes Peak in Colorado Springs and wondering at all of the "pebbles and chunks of rock everywhere." It's true, Warren Brown, the Rocky Mountains are called that for a reason. They really are an enormous pile of rocks. So he developed this cake in which "nuggets" of apple, banana and walnuts are suspended in the cakey batter. What he doesn't mention is that CO is actually kind of proud of its apples. At least, I always remember hearing about the orchards in Hotchkiss on Colorado's Western Slope, who sell their fruit at various farmers markets in Denver.

New York, as it happens, is also pretty proud of its apples. In fact, on the weekends, I often ride my bike out of the city and out to some apple orchards a few hours away. So this cake is a tribute to my home state, made with the wonderful produce from my adopted state.

Apple-Banana-Walnut-Nugget Cake
Adopted from Warren Brown's United Cakes of America

Dry Ingredients:
2 1/2 cups all purpose flour
1/4 cup unsweetened cocoa powder
1/4 teaspoon salt
1/2 teaspoon nutmeg
3/4 cup walnuts

Wet Ingredients:
2 apples, whatever you have, peeled and diced into 1/2 inch pieces
3 large, very ripe bananas, peeled
1/4 cup sour cream
1/4 cup heavy cream
1/4 cup milk
2 tablespoons brandy
1 teaspoon vanilla extract

Creaming Ingredients
1 1/2 sticks unsalted butter, slightly softened
2 1/4 cups superfine granulated sugar (if you can't find superfine, just wizz regular granulated sugar in a food processor to make it superfine)
4 whole eggs
3 egg yolks

For the Glaze (I found there to be far too much glaze, and would recommend cutting the below ingredients in half)
1/2 cup milk
1 tablespoon cream
1 1/2 cups confectioners' sugar, sifted
1/4 teaspoon nutmeg
1 teaspoon vanilla extract
5 ounces bittersweet chocolate

Oven preheated to 350F, with the rack in the middle. Butter a 12-cup bundt pan and set aside.

Place all of the dry ingredients except the walnuts into a bowl and whisk to combine. Measure out 1/2 cup of the dry mixture and toss it with the walnuts in a small, separate bowl. Set aside.

Slice the bananas into 1/3 inch pieces. Set aside 1/2 cup, and mash the rest of the banana slices in a bowl. Add the rest of the banana, the apples, and the rest of the wet ingredients. Stir gently to combine.

In the bowl of a standing mixer fitted with the paddle attachment, cream the butter and sugar together on low speed for about 5 minutes. The mixture should be light in texture. Add the whole eggs and then the yolks one at a time, allowing each to incorporate before adding the next.

Alternate adding the dry and the wet ingredients, adding them in fourths. Don't pause between additions. Remove the bowl from the mixer and gently fold in the walnuts. Pour the batter into the prepared bundt pan and bake for about 60 minutes, or until it passes the toothpick test. Allow the cake to cool on a wrack for 20 minutes before inverting it onto a plate.

In the meantime, make the glazes. Whisk together all of the glaze ingredients except the chocolate and divide evenly between two bowl. Melt the chocolate either in a double boiler or simply in the microwave. Stir half of the melted chocolate into one of the bowls of glaze.

When the cake is warm, pour all three glazes over the top. Start with the white glaze, then the brown, then the pure chocolate. Slice and enjoy.

Senin, 02 Agustus 2010

Just Add Water - Instant Chickpea Flour Hummus - My Legume Love Affair 25

Instant Chickpea Flour Hummus

I know. Hummus. Ho-hum. Who hasn't put up a hummus recipe since they started blogging? It seems the default dip for cheaters, those who can't quite get with the sniffy program of bacon-walnut taffy and civet coffee.

Well, I'm going to cheat some more. These days, in the home stretch before I go on vacation, I can't get with the program of soaking and boiling dried chickpeas. I can't even be bothered to open a can of them. Blame it on the relentless heat, but I have been especially all about taking it easy this summer, and wish everything and anything could be instantly prepared just by adding water. Chickpea flour is one of the few products that I can depend on to lay the foundation of a meal that processes quickly without being processed food. And if you want to forgo even the smallest of kitchen appliances, you can whip up a mean bowl of hummus with a wire whisk and a little wrist action. Ho-hum, you say? I call it a humdinger.
Chickpea Flour Hummus - Flour, water, and tahini measures taken from the Bob's Red Mill recipe

Ingredients

3/4 cup chickpea flour
2 1/2 cups water
2 tablespoons olive oil
1/4 cup tahini
1 large garlic clove, peeled and (quartered if using food processor; minced or pressed if preparing by hand)
Juice of half large lemon
1 level teaspoon harissa (or more if you like your hummus distinctly incendiary; taste first before adding extra)
1 tablespoon cumin seeds, toasted in a dry skillet for a few minutes
1 tablespoon olive oil
1/4 teaspoon salt, optional

Method

In a large bowl, beat chickpea flour and water with a whisk until well blended. The batter will have a remarkable and surprising fresh-bean aroma. Let rest for 10 minutes to allow reconstitution. The batter will be watery. Pour batter into large saucepan and bring very slowly to a simmer on the lowest heat. Stir constantly; the mixture is prone to clumping, especially if it thickens too rapidly. You will notice how quickly it starts to thicken once it gets warm. Continue to simmer and stir until batter reduces to a thick purée rather than a stiff paste (about 15 minutes). The aroma will now be warm and nutty, not unlike hummus ground from whole chickpeas, yet distinctive. Remove from heat and beat in olive oil and tahini with a whisk. Let cool to room temperature, occasionally beating to maintain texture.

Transfer cooled purée to food processor. (No need to take out your big bruiser; a small-capacity one gets the job done.) Drop in quartered garlic, and pulse until smooth. Add lemon juice. Pulse again. Transfer to a serving bowl. Stir in salt. Top with harissa and cumin seeds. Drizzle with olive oil. Serve as is or gently swirl toppings into hummus to make a pattern. Flavors develop more complexity when allowed to sit. Refrigerate any leftovers. Yields 2 cups.

Serve with pita, flatbread, crackers, or toast. Olives and briskly cold herbal tea well complement the flavors and texture. ~~

Hummus & Harissa
This is for Siri of Siri's Corner, working on the round-up for MLLA 25. Siri expects the details to be finalized this weekend of August 7-8, when she will announce the winner of the random drawing.

Simona of Briciole is currently at the helm of MLLA 26, hosting for August, and is looking forward to you sending your amazing recipes her way.

Thanks very much for making MLLA a romance that you always remember.


Minggu, 01 Agustus 2010

Shiro Plum Jam with Vanilla Bean - Weekend Herb Blogging #244

Shiro Plum Jam with Vanilla Bean

This sweet-tart recipe is so easy I nearly blush with embarrassment to call it a recipe at all. No one can take credit for it; it belongs to everyone, and I fancy, reads like something from the days of antiquity:
Measure 2 cups (any) stone fruit (peeled and pitted) to 1 cup sugar in 1/2 cup water. Stir in juice of half a plump and heavy lemon. Simmer in a large saucepan over low heat until wooden spoon sticks straight without slipping (about 30 minutes). No pectin is necessary. Pour in glass jar. Slip in vanilla bean. Yields about 1 1/2 cups.
There is no better nor faster use for summer fruit that would otherwise turn brown in a bowl for lack of mouths to feed. Don't let it go to waste. Feel free to press in a few star anise instead of the vanilla bean.

This recipe is for Laurie of Mediterranean Cooking in Alaska, hosting Weekend Herb Blogging # 244 for Haalo of Cook Almost Anything at Least Once.

Shiro Plums

Shiro plums, a Japanese variety, are naturally this yellow, but will turn a rich, sunshine-golden hue as they cook, despite the addition of lemon juice. The transformation is quite lovely.

Been There, Done That ~
Pumpkin Butter
Richmond Maids of Honor
Lemon Curd Shortbread

Other People's Eats ~
Peach, Plum and Ginger Jam
Easy Plum Jam
Peach and Cherry Jam Infused with Vanilla Bean